In this tutorial, explain to you how to upload files to AWS ec2 using WinSCP Server in order to facilitate file transfer to and from your Windows desktop.
With WinSCP you can easily upload and manage files on your Amazon EC2 (Elastic Compute Cloud) instance/server over SFTP protocol.
Before starting you should require things to upload files to AWS ec2.
- WinSCP
- information about your EC2 instance
Learn How to: – AWS ubuntu setup || launch an AWS EC2 Server
How to upload files to AWS ec2 using WinSCP
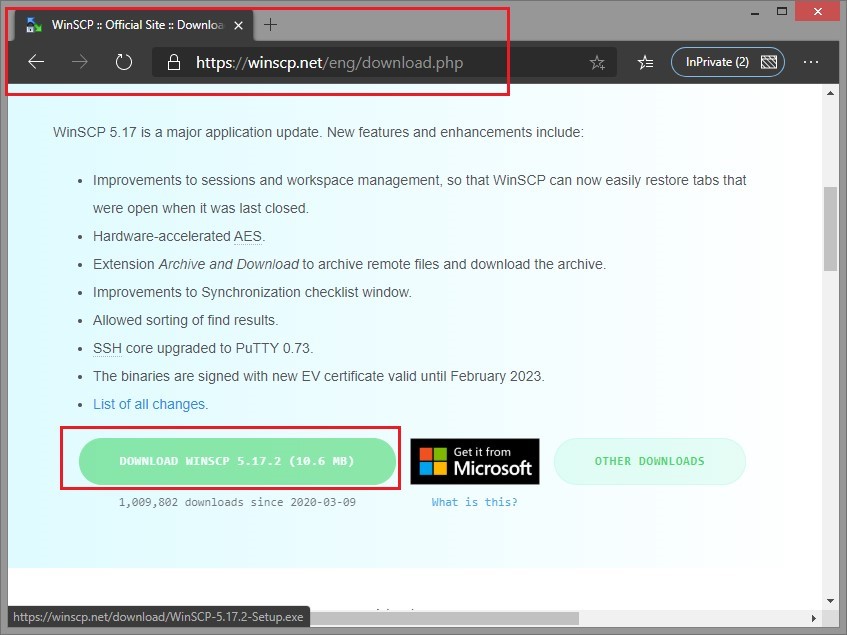
Step 1: – Download WinSCP
Download WinSCP from https://winscp.net for FTP access to instance (file transfer to Virtual Machine).

Step 2: – Install and Open WinSCP
Download WinSCP and install accordingly (choose double-pane view as recommended during installation).

Step 3: – Login in WinSCP
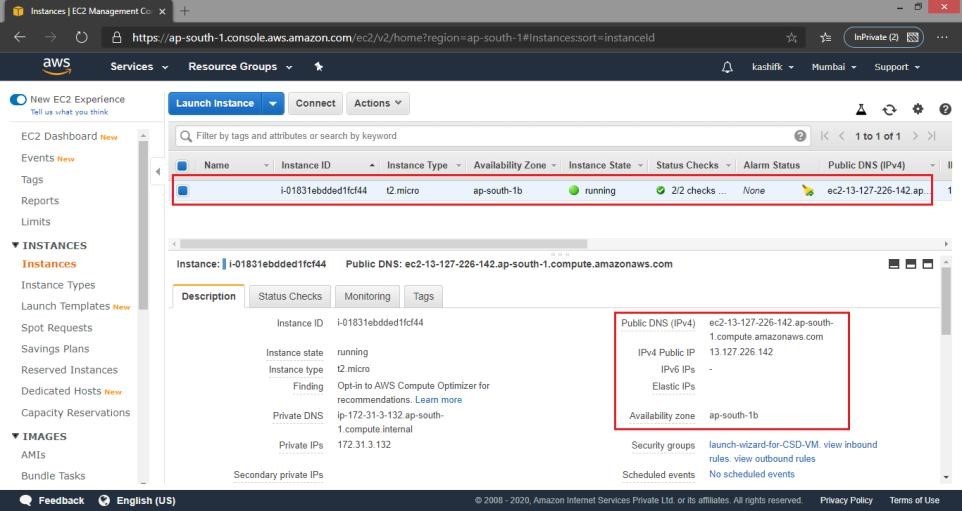
Before login, we require Hostname: Check the Public DNS column on the Instances page of the Amazon EC2 console.
Note that the public DNS may change when an instance is restarted.

Open WinSCP, Login Dialog prompt up:
- Make sure to select a New site node.
- Select an SFTP protocol in file protocol.
- Enter ec2 instance Hostname in Hostname box.
- User name differs with instance type:
- For Amazon Linux AMI, the username is ec2-user.
- For Ubuntu AMI, the username is ubuntu.

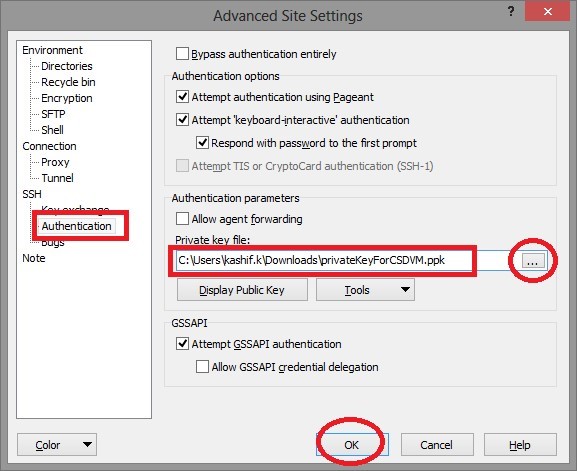
Step 4: – Advanced site setting
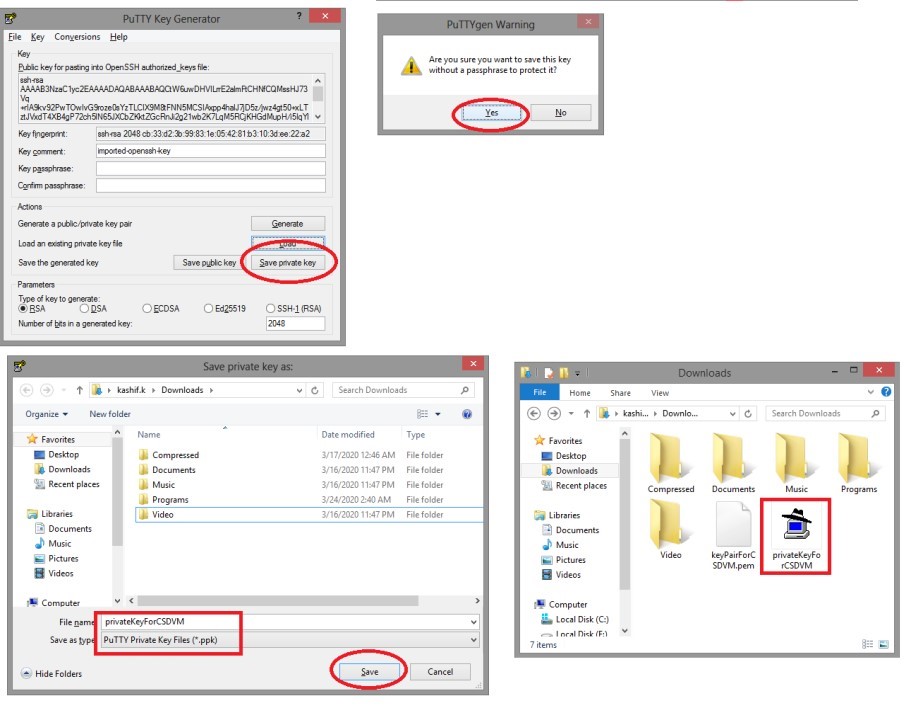
In the advanced window, click Authentication from the left pane, and specify the location of .ppk file generated given below, click ok


Step 5: – Log in
Save your site settings using the Save button. Add host key to cache and proceed with login.

Step 6: – Upload files to AWS ec2 Instance
- The left side window is your PC window.
- The right side window is your ec2 instance server window.
You can see I upload a “list of exp.txt“

Step 7: – Verify / Access the content
Verify/Access the content, after upload, in an instance.

You can access the command prompt by using putty.
Refer:- How to connect ec2 instance using putty
Let us know in the comment section if you have any problem related to Connect ec2 instance using putty.


