In this tutorial, We will learn AWS ubuntu setup || Launch An AWS EC2 Server from scratch. We will configure the Ubuntu 16.04 OS on the server. Also, we will do some essential configuration like setting up the hostname, correct locale, and NTP service.
AWS ubuntu setup||Launch An AWS EC2 Server
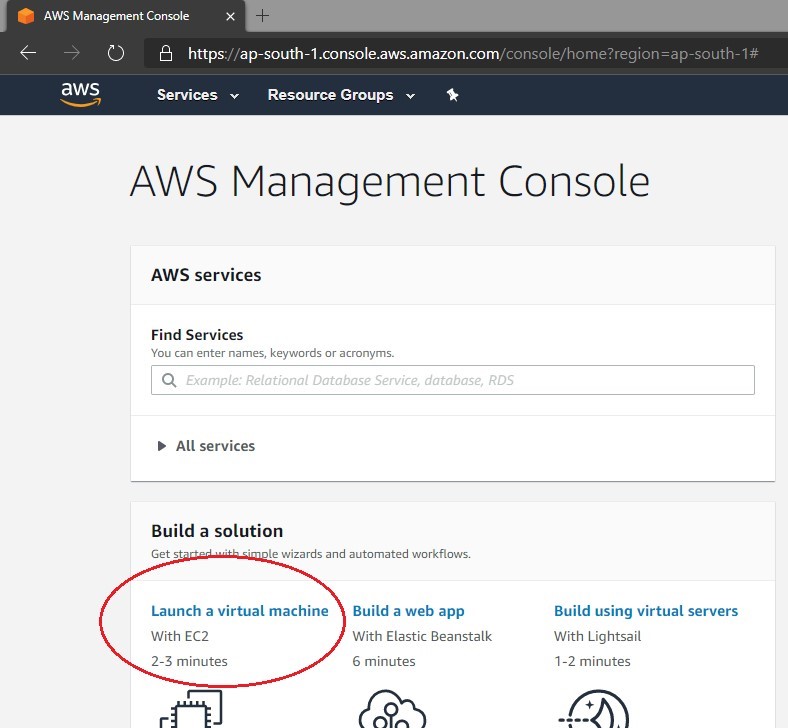
First, you have to Sign-in into the AWS Management Console. If you are a new user Register into AWS
Learn how to:- Setting up Aws sign up || registration
For AWS ubuntu setup requires the following steps:
Step 1: – Launch a virtual machine with EC2
You can launch a Linux instance using the AWS Management Console as described in the following procedure. From the console dashboard, choose Launch Instance.
Step 1: – Choose an Amazon Machine Image (AMI)
In AMI page displays a list of basic configurations, called Amazon Machine Images (AMIs), that serve as templates for your instance. Notice that these AMIs are marked “Free tier eligible.”
Select Ubuntu Server 18.04 LTS(HVM), SSD, which is the latest Ami from Ubuntu.

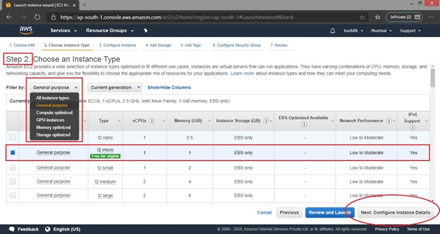
Step 2: – Choose an Instance Type
On the Instance Type page, you can select the hardware configuration of your instance. Select the t2.micro type, which is selected by default which is eligible for the free tier.
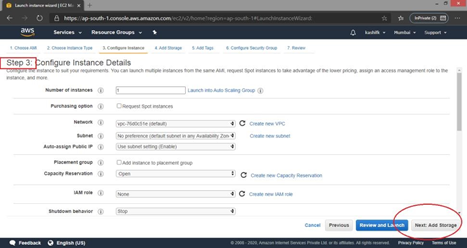
Step 3: – Configure the Instance Details
Configure the instance, keep default and move to the next step that is Add Storage.
Step 4: – Add Storage
By default, EC2 comes with an 8 GiB disk size. You can add storage to Virtual Machine, 30 GB SSD max to free tier and move to the next step that is Add tags.
You should mark on ‘Delete On Termination’ always. This way it will be ensured that this volume would be deleted once the server is deleted.

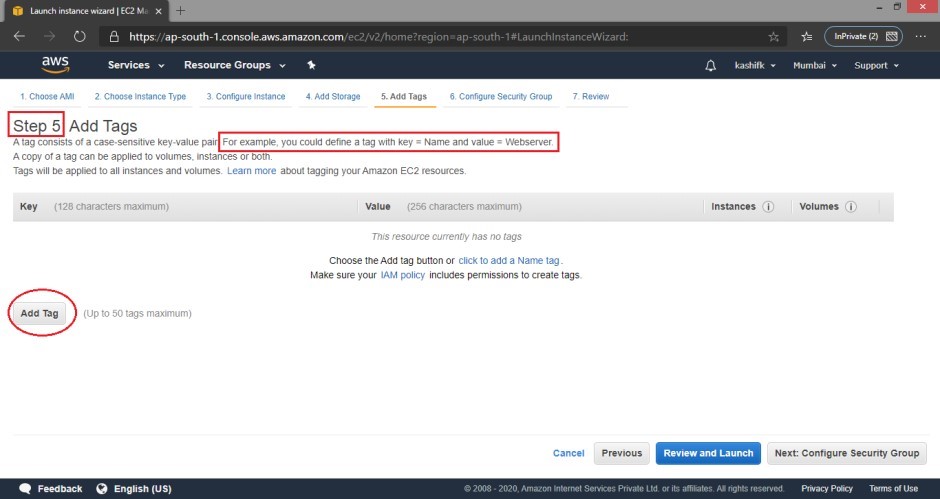
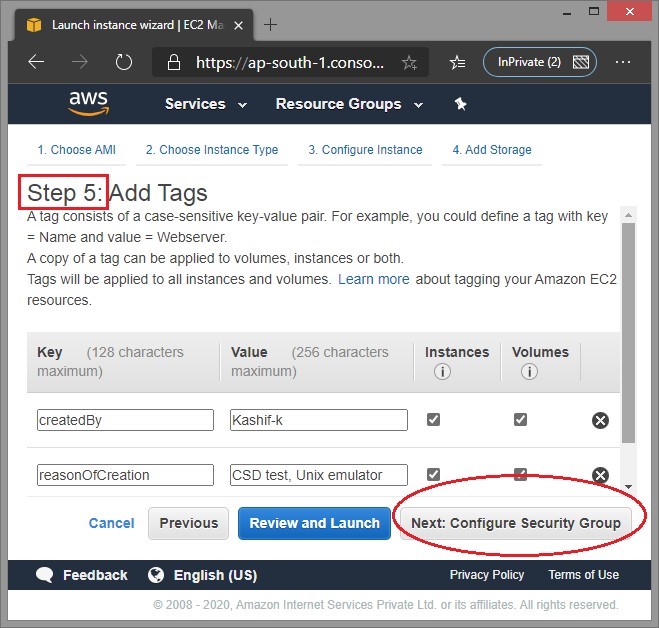
Step 5: – Add Tags
Click on Add Tag and give a good name to the server. A good policy is to use the final domain name that you’re going to assign to the server and move to the next step that is Configure Security Group.
Step 6: – Configure Security Group
Create a new security group, specify name and description of a group, select type of traffic to allow and way of accessing VM

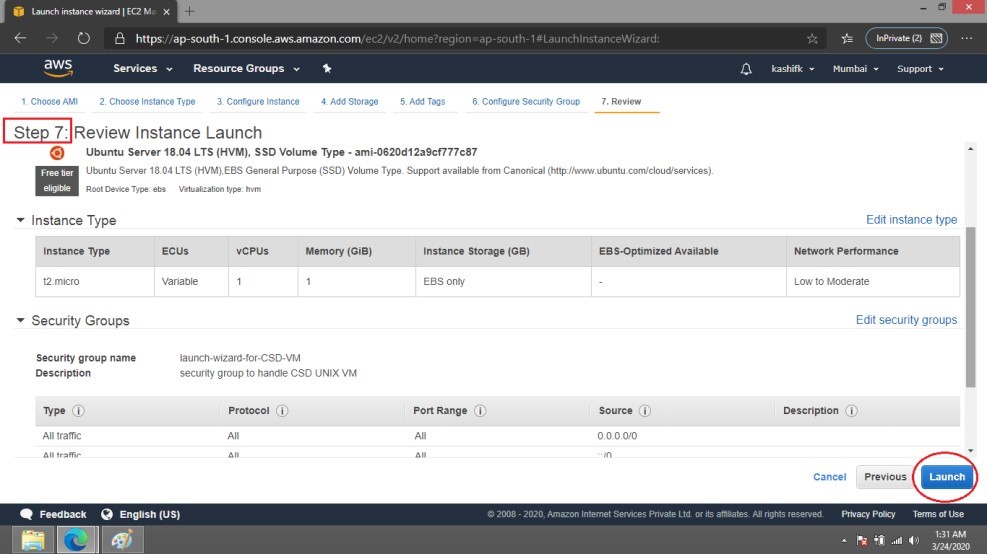
Step 7: – Review Instance Launch
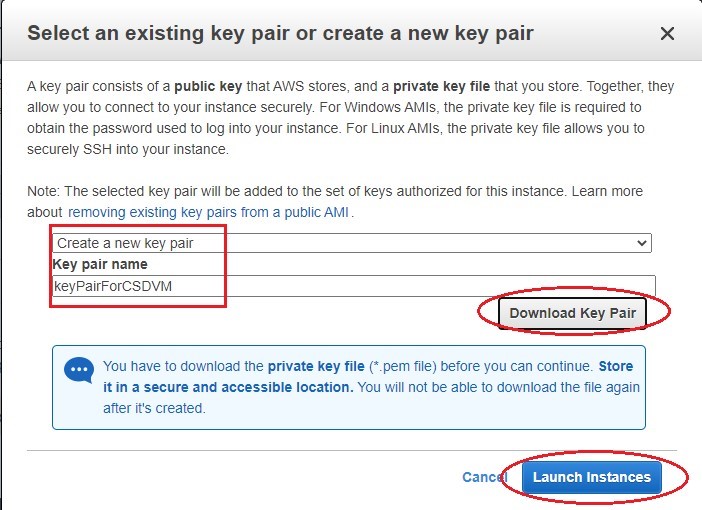
Preview the details if everything is in order in previous steps and launch instance. A pop up will appear which will give you an option of either using existing Key Pair or create a new Key Pair.
A pop up will appear which will give you an option of either using existing Key Pair or create a new Key Pair.
Select Choose an existing key pair, then select the key pair that you created when getting set up.
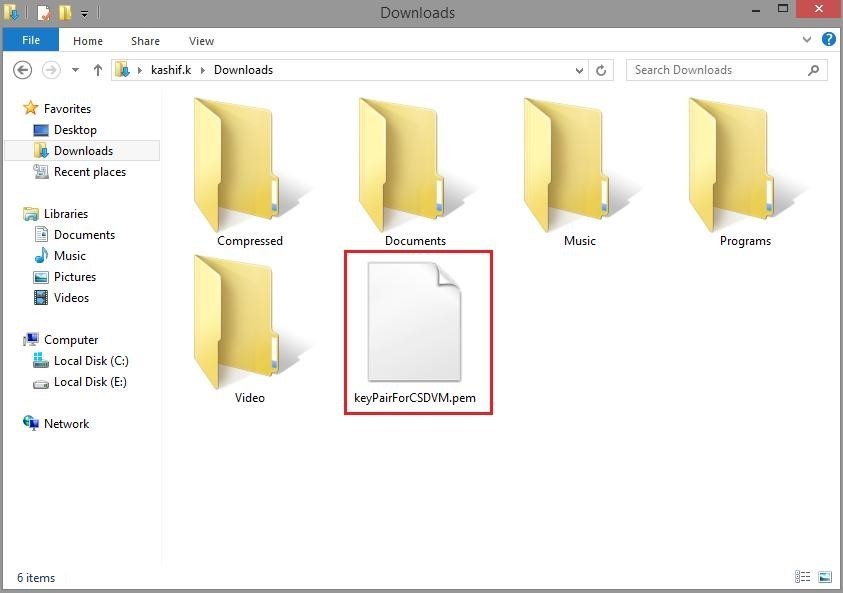
Alternatively, you can create a new key pair. Select Create a new key pair, enter a name for the key pair, and then choose Download Key Pair.
“This is the only chance for you to save the private key file, so be sure to download it. Save the private key file in a safe place. You’ll need to provide the name of your key pair when you launch an instance and the corresponding private key each time you connect to the instance.”
Don’t select the Proceed without a key pair option. If you launch your instance without a key pair, then you can’t connect to it.
Step 8: – Launch Status
A confirmation page lets you know that your instance is launching. Choose View Instances to close the confirmation page and return to the console.

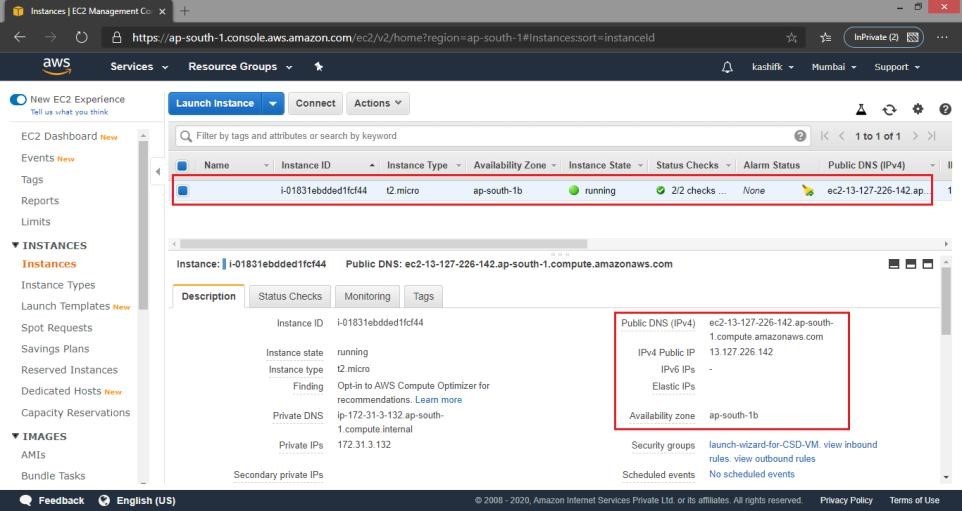
On the Instances screen, you can view the status of the launch. It takes a short time for an instance to launch.
When you launch an instance, its initial state is pending. After the instance starts, its state changes to running and it receives a public DNS name.
Learn:- How to connect ec2 instance using putty


