In this tutorial, We will learn how to connect ec2 instance using putty from scratch.
PuTTY is a free and open-source terminal emulator, serial console and network file transfer application. It supports several network protocols, including SCP, SSH, Telnet, login, and raw socket connection. It can also connect to a serial port.
Learn How to: – Setting up Aws sign up || registration
Learn How to: – AWS ubuntu setup || launch an AWS EC2 Server
How to connect ec2 instance using putty
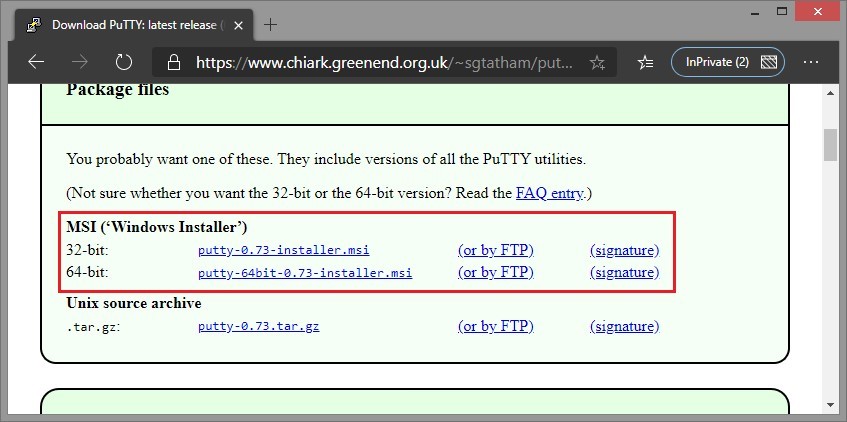
Step 1: – Download PuTTy
If you don’t have the PuTTY software installed on your system, you will need to download it from www.putty.org. Be sure to select here in the above picture.
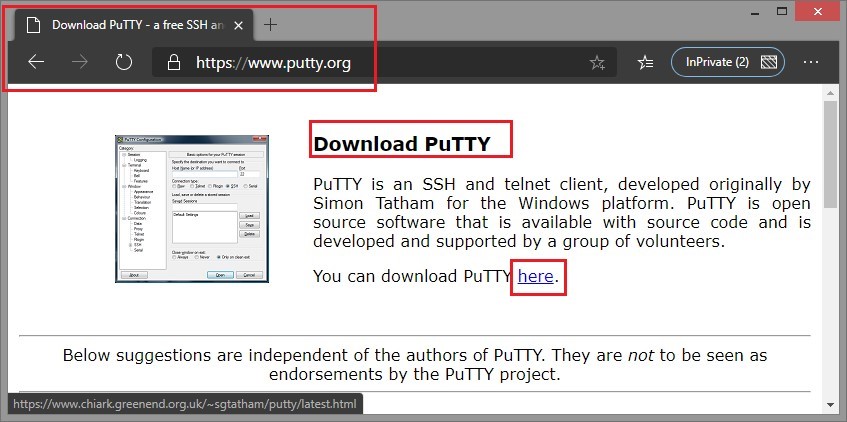
Download:- Based on your window system download 32bit or 64bit.
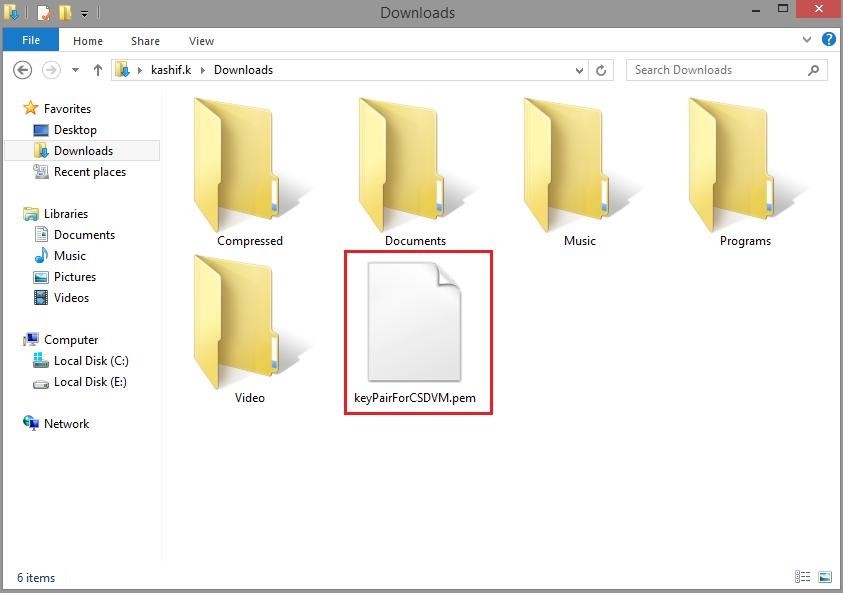
Step 2: – Download Your EC2 Key Pair File
This Key pair file that you downloaded in AWS ubuntu setup || launch an AWS EC2 Server i.e .pem file. Now we require here.
A key pair consists of a public key that AWS stores and a private key file that you store (downloaded as PEM file). PEM stands for Privacy Enhanced Mail and is a widely used X.509 encoding format used for security certificates. Together, the two keys enable you to securely connect to your EC2 instance using SSH.
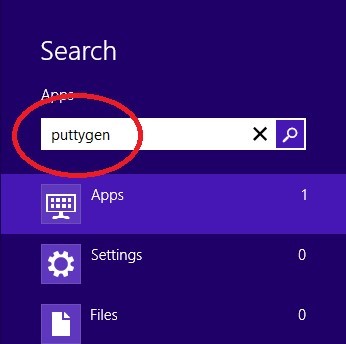
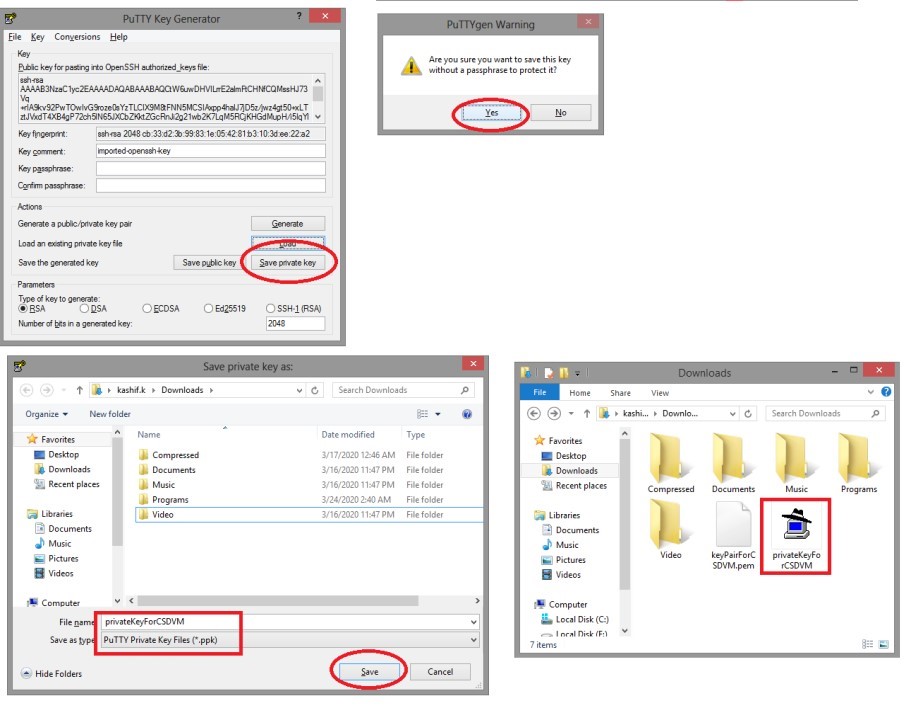
Step 3: – Open PuTTygen
Open puttygen, a utility to extract the private key from public-private key pair downloaded.
Step 4: – Convert the private key from public-private key pair
Click Load button, select .pem file downloaded in, click open, it will display a success message.

Click on Save private key button (with or without password for future use), save it in a secure location as .ppk file
Step 5: – Open PuTTygen
Open the PuTTY application.

Step 6: – Enter Hostname
In AWS -> Instance-> copy hostname, expand SSH from the left pane(Public DNS(IPv4)).
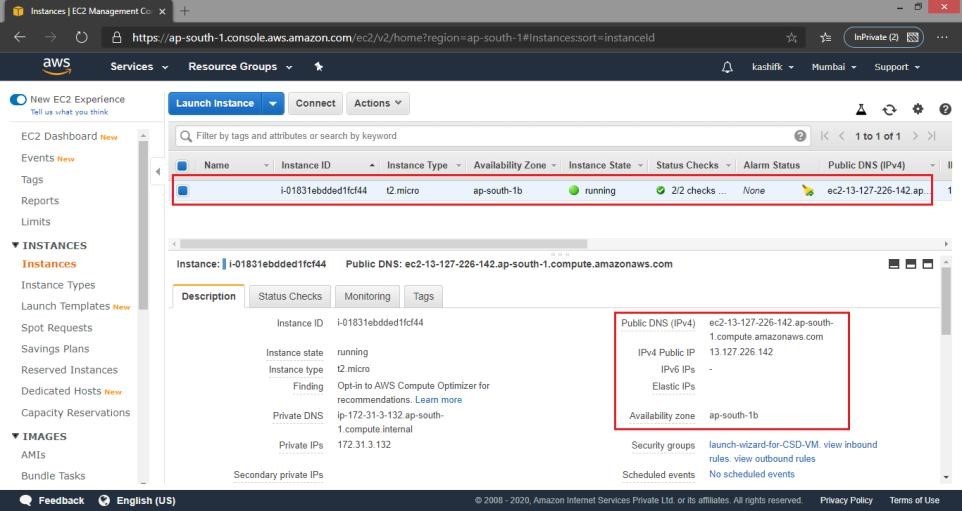
Paste-on PuTTy Configuration

Step 7: – Enter .ppk file
Click SSH -> Auth and then browse for .ppk file generated in Step 6, click open to access VM instance.
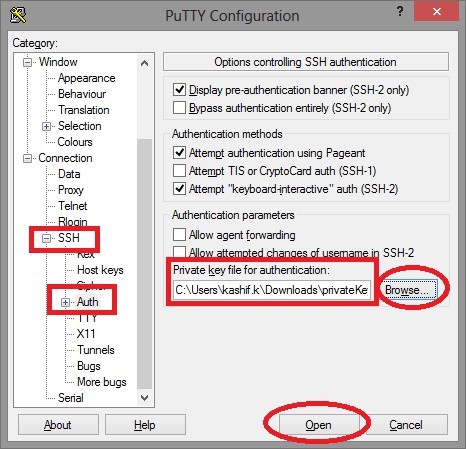
Then click on Open and it should connect you to your publically accessible EC2 instance (in this scenario, this instance would be referred to as the Bastion host or a jump box).
In PuTTY security alert click Yes to add instance host as trustable.
If this is the first time you have connected to this instance, PuTTY displays a security alert dialog box that asks whether you trust the host to which you are connecting.

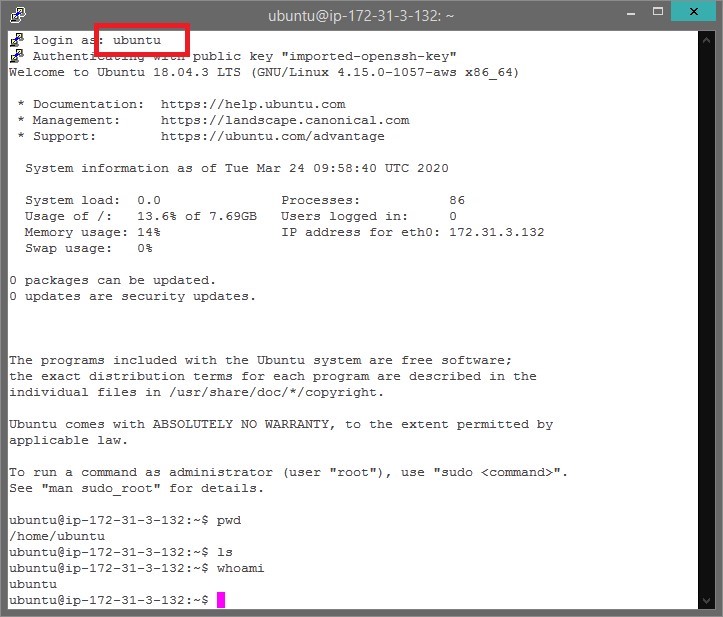
Step 8: – Login into an Instance
Login using login name, in this case, ‘ubuntu’.
Let us know in the comment section if you have any problem related to Connect ec2 instance using putty


