Today we will see how to build the Responsive React Carousel, Slider from Scratch

The carousel is a slideshow for cycling through a series of content, built with CSS 3D transforms and a bit of JavaScript. It works with a series of images, text, or custom markup. It also includes support for previous/next controls and indicators.
Building a Responsive React Carousel
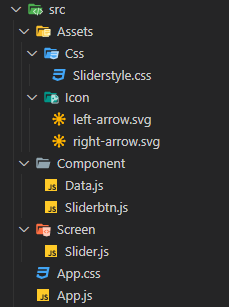
File needed
Assets:- It Includes Icon(Left and Right icon), CSS (Stylesheet) Folder
Component:
- Data.js : data containing object
- Sliderbtn.js : Slide button of Slider/ Carousel
Screen:
- Slider.js : Main code of Carousel / Slider
1. Data Containing Object
First, we will need to create a component that can contain all the data of the Carousel / Slider.
Let’s create the Data.js first with the below code:
export const Data = [
      {
        id: 1,
        title: "Lorem ipsum 1",
        img:"https://i0.wp.com/mechtecengineering.com/wp-content/uploads/2021/05/2-slider3.jpg?fit=1500%2C423&ssl=1",
        description: "Lorem"
      },
      {
        id: 2,
        title: "Lorem ipsum 2",
        img:"https://i1.wp.com/mechtecengineering.com/wp-content/uploads/2021/05/2-slider2.png?fit=1500%2C423&ssl=1",
        description: "Lorem"
      },
      {
        id: 3,
        title: "Lorem ipsum 3",
        img:"https://i0.wp.com/mechtecengineering.com/wp-content/uploads/2021/05/2-slider3.jpg?fit=1500%2C423&ssl=1",
        description: "Lorem"
      },{
        id: 4,
        title: "Lorem ipsum 4",
        img:"https://i1.wp.com/mechtecengineering.com/wp-content/uploads/2021/05/2-slider2.png?fit=1500%2C423&ssl=1",
        description: "Lorem"
      },
      {
        id: 5,
        title: "Lorem ipsum 5",
        img:"https://i0.wp.com/mechtecengineering.com/wp-content/uploads/2021/05/2-slider3.jpg?fit=1500%2C423&ssl=1",
        description: "Lorem"
      },
]
Insert Data in PHP Ajax MySQL By Using Bootstrap Modal
2. Implement of Slider / Carousel Code in React
Next, you have to create components for the Carousel. This Component will include data of Carousel, previous and next button function, dots buyton function .
Let’s create the Slider.js in Screen Folder with the below code:
import React, { useState } from 'react'
import { Data } from '../Component/Data'
import '../Assets/Css/Sliderstyle.css';
import { Sliderbtn } from '../Component/Sliderbtn';


export const Slider = () => {
    const [slideIndex, setSlideIndex] = useState(1)

    // Previous Button Function
    const nextSlide = () => {
        if (slideIndex !== Data.length) {
            setSlideIndex(slideIndex + 1)
        }
        else if (slideIndex === Data.length) {
            setSlideIndex(1)
        }
    }

    // Previous Button Function
    const prevSlide = () => {
        if (slideIndex !== 1) {
            setSlideIndex(slideIndex - 1)
        }
        else if (slideIndex === 1) {
            setSlideIndex(1)
        }
    }

    // Carousel dots
    const moveDot = index => {
        setSlideIndex(index)
    }

    return (
        <div className="containerSlide">
            {
                Data.map((item, index) => {
                    if (index + 1 === slideIndex) {
                        return (
                            <div className="slide active" key={index}>
                                <div className="slidertitle">{item.title}</div>
                                <img src={item.img} />
                            </div>
                        )
                    }
                })
            }
            <Sliderbtn moveSlide={nextSlide} direction={"next"} />  {/* Next Button */}
            <Sliderbtn moveSlide={prevSlide} direction={"prev"} /> {/* Prev Button  */}

            {/* Carousel Dots */}
            <div className="containerdots">
                {Array.from({ length: Data.length }).map((item, index) => (
                    <div
                        onClick={() => moveDot(index + 1)}
                        className={slideIndex === index + 1 ? "dot active" : "dot"}
                    ></div>
                ))}
            </div>
        </div>
    )
}
3. Add the Carousel to App.js
Here we need to import Slider.js to App.js to see the preview .
File:- App.js
import logo from './logo.svg';
import './App.css';
import { Slider } from './Screen/Slider';

function App() {
  return (
    <div>
      <Slider/>
    </div>
  );
}
export default App;
4. Slider Buttons
Next, you have to create components for the Button of Carousel.
Let’s create the Sliderbtn.js in Component Folder with the below code:
import React from 'react';
import leftArrow from "../Assets/Icon/left-arrow.svg";
import rightArrow from "../Assets/Icon/right-arrow.svg";
import '../Assets/Css/Sliderstyle.css';

export const Sliderbtn = (props) => {
    return (
        <button
        onClick={props.moveSlide}
        className={props.direction === "next"? "btn-slide next" : "btn-slide prev" }>
            <img src={props.direction === "next"? rightArrow :  leftArrow } />
        </button>
    )
}
Steps to create a retaining and engaging mobile application
4. Add some styling
Let’s create the Sliderstyle.js in Assets/Css Folder with the below code:
  .containerSlide {
    max-width: 100%;
    height: 450px;
    position: relative;
    overflow: hidden;
  }
  .slide{
      width: 100%;
      height: 100%;
      position: absolute;
      opacity: 0;
      transition: opacity ease-in-out 0.4s;
  }
  .slide img {
      width: 100%;
      height: 100%;
      object-fit: cover;
  }
  .active {
    opacity: 1;
  }
  .btn-slide {
    width: 60px;
    height: 60px;
    border-radius: 50%;
    background: #f1f1f1;
    border: 1px solid rgba(34, 34, 34, 0.287);
    position: absolute;
    display: flex;
    justify-content: center;
    align-items: center;
    cursor: pointer;
  }
  .btn-slide img {
    width: 25px;
    height: 25px;
    pointer-events: none;
  }
  .prev {
    top: 50%;
    left: 20px;
    transform: translateY(-60%);
  }
  .next {
    top: 50%;
    right: 20px;
    transform: translateY(-60%);
  }
  .slidertitle{
    position: absolute;
    bottom: 50px;
    display: flex;
    left: 50%;
    transform: translateX(-50%);
    font-size: 2rem;
    font-weight: bold;
  }
  .containerdots {
    position: absolute;
    bottom: 10px;
    left: 50%;
    transform: translateX(-50%);
    display: flex;
  }
  .dot {
    width: 10px;
    height: 10px;
    border-radius: 50%;
    border: 3px solid #f1f1f1;
    margin: 0 5px;
    background: #f1f1f1;
  }
  .dot.active {
    background: rgb(32, 32, 32);
  }
If you get trouble or anything you don’t understand, just let me know in the comment section.
Related: –