In this tutorial, we will create a simple registration and login system using PHP and MySQL along with javascript alert.
Secure Login System with PHP and MySQL

Requirements
- Knowledge of HTML, CSS, PHP and MySQL for creating the login system.
- Text Editor – For writing the code. We can use any text editor such as VisualCode, Notepad, Notepad++, Sublime , etc.
- XAMPP – XAMPP is a cross-platform software, which stands for Cross-platform(X) Apache server (A), MySQL (M), PHP (P), Perl (P). XAMPP is a complete software package, so, we don’t need to install all these separately.
File need
Now, we will create five files here for the login system.
- db.php – Connection file contains the connection code for database connectivity
- login.php – Login page.
- register.php – Register page.
- auth.php – This file validates the form data with the database which is submitted by the user.
- home.php – the user redirect after login.
Save all these files in the htdocs folder inside the Xampp installation folder. The detailed description and code for these files are discussed below.
In this section, we’ll build a registration system that allows users to create a new account by filling out a web form. But, first, we need to create a table that will hold all the user data.
Step 1: Creating the Database Table
Execute the following SQL query to create the users table in your MySQL database.
Database name should be loginsystem.
--
-- Database: `loginsystem`
--
CREATE TABLE `users` (
  `id` int(11) NOT NULL AUTO_INCREMENT,
  `fullname` varchar(255) NOT NULL DEFAULT '',
  `gender` varchar(255) NOT NULL,
  `email` varchar(255) NOT NULL,
  `username` varchar(255) NOT NULL,
  `password` varchar(255) NOT NULL,
  `phoneno` char(10) NOT NULL,
   PRIMARY KEY (id)
)
--
Step 2: Creating the DB File
After creating the table, we need to create a PHP script in order to connect to the MySQL database server. Let’s create a file named “db.php” and put the following code inside it.
<?php
$connect= mysqli_connect("localhost", "root", "", "loginsystem");
// Check connection
if($connect === false){
    die("ERROR: Could not connect. " . mysqli_connect_error());
}
?>
Step 3: Creating the Registration file
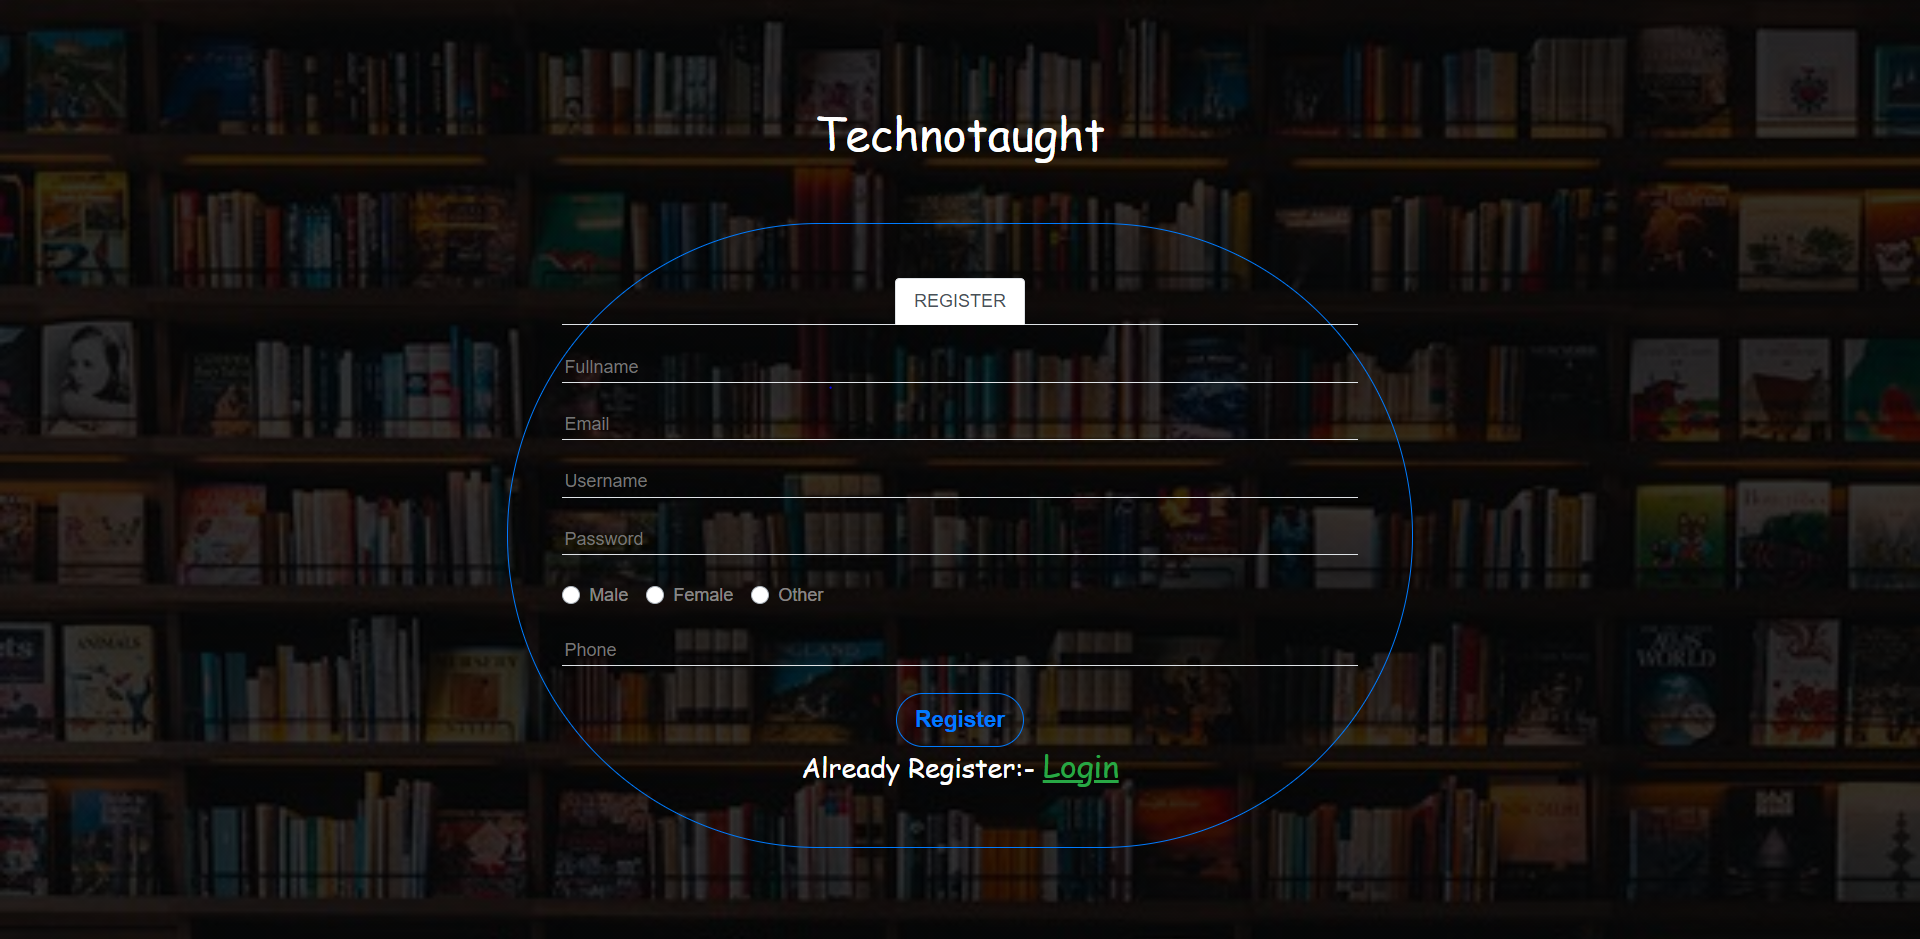
Let’s create another PHP file “register.php” and put the following example code in it.
This script will also generate script errors if a user tries to submit the form without entering any value, or if the username or email entered by the user is already taken by another user.
<?php
    include ("db.php");
    if (isset($_POST["register"])){
        $name = $_POST['fullname'];
        $username = $_POST['username'];
        $password = $_POST['password'];
        $gender = $_POST['gender'];
        $email = $_POST['email'];
        $phone = $_POST['phoneno'];
        $sql_u = "SELECT * FROM users WHERE username='$username'";
        $sql_e = "SELECT * FROM users WHERE email='$email'";
        $res_u = mysqli_query($connect, $sql_u);
        $res_e = mysqli_query($connect, $sql_e);
        if (mysqli_num_rows($res_u) > 0) {
            $name_error = "Sorry... username already taken";
            echo "<script type='text/javascript'> onload = function(){alert('$name_error');
            }</script>";
        }else if(mysqli_num_rows($res_e) > 0){
            $email_error = "Sorry... email already taken";
            echo "<script type='text/javascript'> onload = function(){alert('$email_error');
                }</script>";
        }else{
            $query="INSERT INTO users (fullname,gender,email,username,password,phoneno) VALUES ('$name','$gender','$email','$username','".md5($password)."','$phone')";
            $data= mysqli_query($connect,$query);
            if($data){
                $sucess_error = "Success";
                echo "<script type='text/javascript'> onload = function(){alert('$sucess_error');
                }</script>";
            }
        }
}
?><!--register end--->
<!DOCTYPE html>
<html>
<title>Register</title>
<meta charset="UTF-8">
<meta name="viewport" content="width=device-width, initial-scale=1">
<link rel="stylesheet" href="https://stackpath.bootstrapcdn.com/bootstrap/4.4.1/css/bootstrap.min.css" integrity="sha384-Vkoo8x4CGsO3+Hhxv8T/Q5PaXtkKtu6ug5TOeNV6gBiFeWPGFN9MuhOf23Q9Ifjh" crossorigin="anonymous">
<link rel="stylesheet" href="css/style.css">
<body>
    <div class="p-5" id="main" >
        <div class="container-fluid " id="login1"  >
            <div class="text-white p-5 h1 text-center"  style="font-family: 'Sigmar One', cursive;">Technotaught</div>
                <div class="row">
                    <div class=" col-sm-0 col-md-3">
                    </div>
                    <div class="col border p-5 rounded-pill border-primary">
                    <ul class="nav nav-tabs justify-content-center">
                        <li class="nav-item">
                        <a class="nav-link active">REGISTER</a>
                        </li>
                    </ul>
                    <!---Login start--->
                        <div class="tab-pane" id="login">
                            <form action="" autocomplete="on" method="POST" ><br>
                                <div class="input-group border-bottom">
                                    <input class="input--style-3" type="text" placeholder="Fullname" name="fullname" value="<?php if (isset($fullname)){ echo $fullname; }?>"  required>
                                </div><br>
                                <div class="input-group border-bottom">
                                    <input class="input--style-3" type="email" placeholder="Email" name="email" value="<?php if (isset($email)){ echo $email; } ?>" autocomplete="off" required>
                                </div><br>
                                <div class="input-group border-bottom">
                                    <div class="form_error" >
                                        <input class="input--style-3" type="text" placeholder="Username" name="username" value="<?php if (isset($username)){ echo $username; }?>" autocomplete="off" required>
                                    </div>
                                </div><br>
                                <div class="input-group border-bottom">
                                    <input class="input--style-3" type="password" placeholder="Password" name="password" required>
                                </div><br>
                                <div class="input-group">
                                    <div class="custom-control custom-radio custom-control-inline">
                                    <input type="radio" id="customRadio1" name="gender" class="custom-control-input" value="male" required>
                                    <label class="custom-control-label text-white-50" for="customRadio1">Male</label>
                                    </div>
                                    <div class="custom-control custom-radio custom-control-inline">
                                    <input type="radio" id="customRadio2" name="gender" class="custom-control-input" value="female">
                                    <label class="custom-control-label text-white-50" for="customRadio2">Female</label>
                                    </div>
                                    <div class="custom-control custom-radio custom-control-inline">
                                    <input type="radio" id="customRadio3" name="gender" class="custom-control-input" value="other">
                                    <label class="custom-control-label text-white-50" for="customRadio3">Other</label>
                                    </div>
                                </div>  <br>
                                <div class="input-group border-bottom">
                                    <input class="input--style-3" type="tel" pattern="[0-9]{10}" id="phoneno" placeholder="Phone" name="phoneno" required>
                                </div><br>
                                <div class="p-t-10" align="center">
                                    <button class="btn btn-outline-primary rounded-pill btn-lg font-weight-bolder " type="submit"  name="register">Register</button>
                                </div>
                                <div class="text-white  h4 text-center"  style="font-family: 'Sigmar One', cursive;">Already Register:-  <a class="text-success h3"href="login.php"><u>Login</u></a></div>
                            </form>
                        </div>
                <!---Login end--->
                    </div>
                    <div class=" col-sm-0 col-md-3">
                </div>
            </div>
        </div>
    </div>
    <!--container end-->
</body>
</html>
The output of the Registration page example

Step 4: Creating the login file
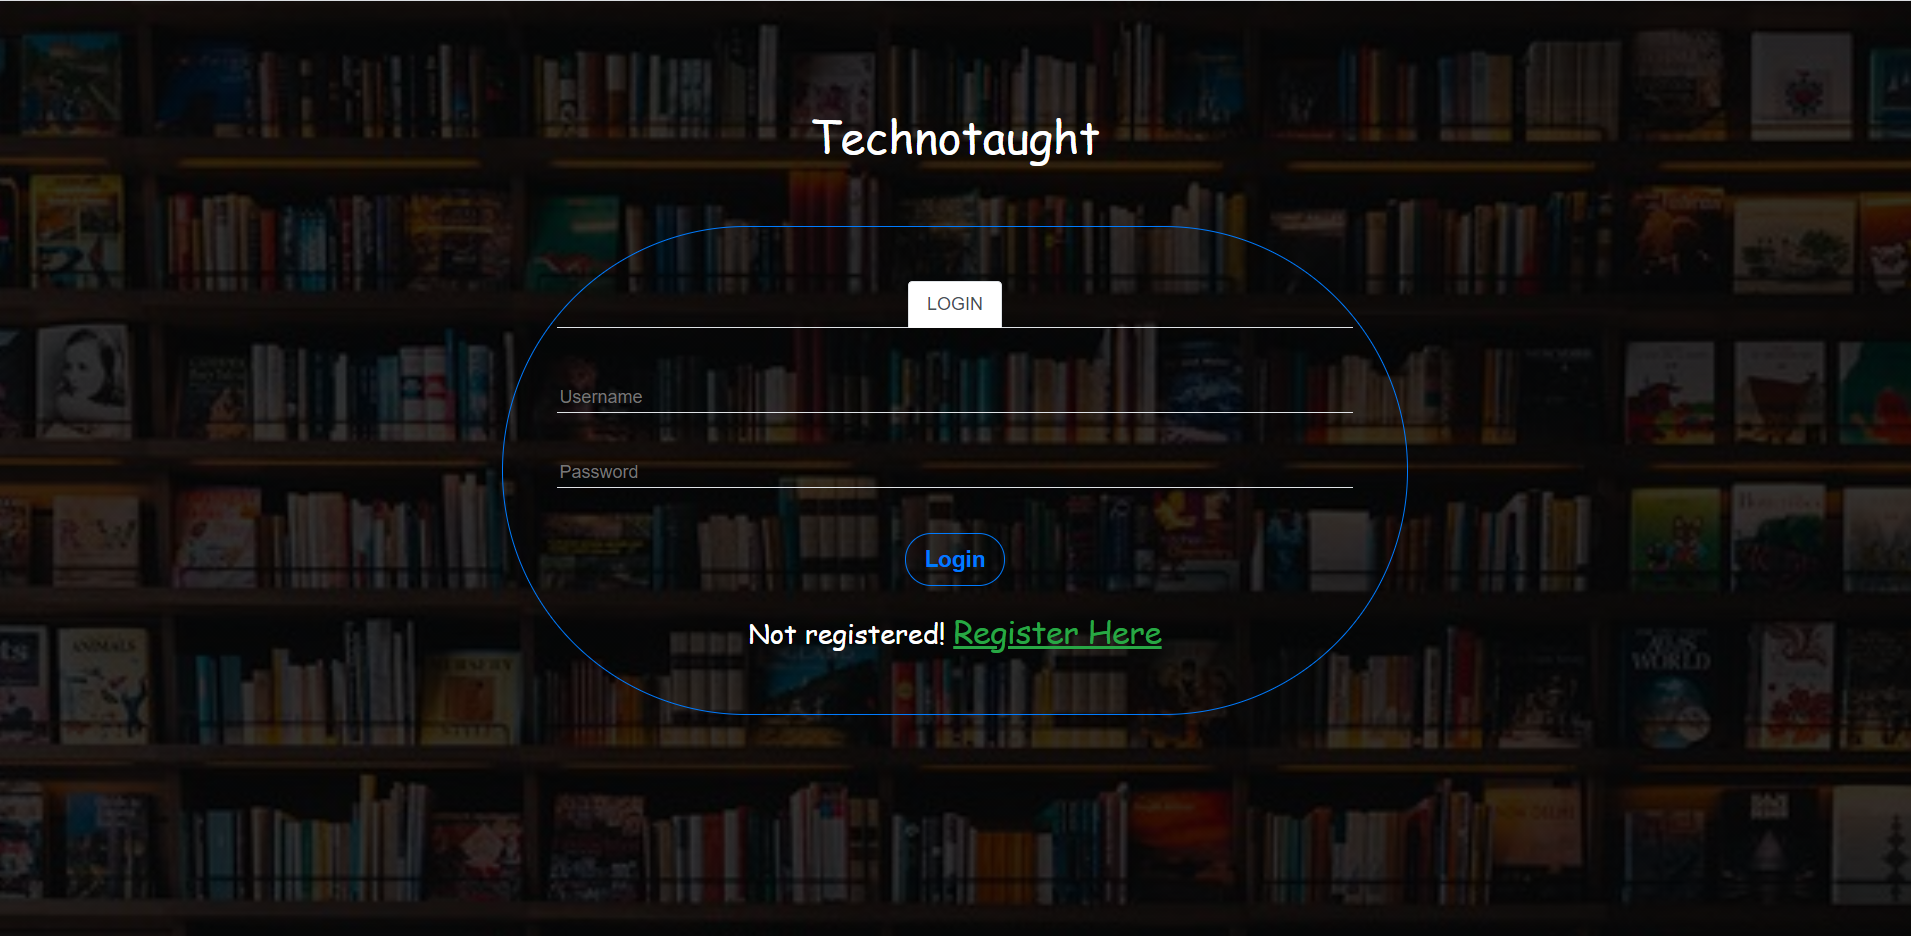
Let’s create another PHP file “login.php” and put the following example code in it.
This script will also generate script errors if a user tries to submit the form without entering any value, or if the username or password is wrong.
<?php
    require('db.php');
    session_start();
    error_reporting(0);

    // If form submitted, insert values into the database.
    if (isset($_POST['login'])){
    // removes backslashes
        $username1 = stripslashes($_REQUEST['username']);
        //escapes special characters in a string
        $username1 = mysqli_real_escape_string($connect,$username1);
        $password1 = stripslashes($_REQUEST['password']);
        $password1 = mysqli_real_escape_string($connect,$password1);
         //Checking is user existing in the database or not
        $query2 = "SELECT * FROM `users` WHERE username='$username1'
        and password='".md5($password1)."' ";
        $result = mysqli_query($connect,$query2) or die(mysql_error());
        $rows = mysqli_num_rows($result);
        if($rows==1){
            $_SESSION['username'] = $username1;
            $_SESSION['email'] = $email1;
            // Redirect user to index.php
            header("Location:home.php");
        }else{
            $name_error1 =  "Username or Password is incorrect";echo "<script type='text/javascript'> onload = function(){alert('$name_error1');}</script>";
        }
    }
?><!--login end-->


<!DOCTYPE html>
<html>
    <title>login</title>
    <meta charset="UTF-8">
    <meta name="viewport" content="width=device-width, initial-scale=1">
    <link rel="stylesheet" href="https://stackpath.bootstrapcdn.com/bootstrap/4.4.1/css/bootstrap.min.css" integrity="sha384-Vkoo8x4CGsO3+Hhxv8T/Q5PaXtkKtu6ug5TOeNV6gBiFeWPGFN9MuhOf23Q9Ifjh" crossorigin="anonymous">
    <link rel="stylesheet" href="css/style.css">

<body>
    <div class="p-5" id="main" >
    <div class="container-fluid " id="login1"  >
        <div class="text-white p-5 h1 text-center"  style="font-family: 'Sigmar One', cursive;">Technotaught</div>
            <div class="row">
                <div class=" col-sm-0 col-md-3">
                </div>
                <div class="col border p-5 rounded-pill border-primary">
                <ul class="nav nav-tabs justify-content-center">
                    <li class="nav-item">
                    <a class="nav-link active">LOGIN</a>
                    </li>
                </ul>
                <!---Login start--->
                    <div class="tab-pane" id="login">
                        <form action="" method="POST">
                            <br>
                            <div class="form-group">
                                <label for="exampleInputEmail1"></label>
                                <input type="text" placeholder="Username" name="username" required class=" input--style-3 border-bottom" >
                            </div>
                            <div class="form-group ">
                                <label for="exampleInputPassword1"></label>
                                <input type="password" placeholder="Password" name="password" required class=" input--style-3 border-bottom"  id="exampleInputPassword1">
                            </div>
                            <div class="form_error">
                                <span> <?php echo " <span class=\"text-danger\"> $name_error1 </span>" ; ?></span>
                            </div>
                            <br>
                            <div class="text-center">
                                <button  type="submit" name="login" class="btn btn-outline-primary rounded-pill btn-lg font-weight-bolder">Login</button>
                            </div>
                            <br>
                            <div  class="text-white  h4 text-center"  style="font-family: 'Sigmar One', cursive;">
                                Not registered! <a class="text-success h3" href="register.php"><u>Register Here</u> </a>
                            </div>
                        </form>
                    </div>
            <!---Login end--->
                </div>
                <div class=" col-sm-0 col-md-3">
                </div>
            </div>
        </div>
    </div>
    </div>
</body>
</html>
The output of the login page.

Step 5: Creating the Welcome Page
Let’s create another PHP file “home.php” and put the following example code in it. where the user is redirected after successful login.
<?php include("auth.php");?>
<!DOCTYPE html>
<html>
<title>Home</title>
<meta charset="UTF-8">
<meta name="viewport" content="width=device-width, initial-scale=1">
<link rel="stylesheet" href="https://stackpath.bootstrapcdn.com/bootstrap/4.4.1/css/bootstrap.min.css" integrity="sha384-Vkoo8x4CGsO3+Hhxv8T/Q5PaXtkKtu6ug5TOeNV6gBiFeWPGFN9MuhOf23Q9Ifjh" crossorigin="anonymous">
<link rel="stylesheet" href="css/style.css">
<body>
    <div class="container text-center p-5 m-5">
        <div class="text-white p-5 display-1 text-center"  style="font-family: 'Sigmar One', cursive;">Hello, Sir</div>
        <div class="text-white p-5 display-4 text-center"  style="font-family: 'Sigmar One', cursive;">How are you</div>
        <div class="btn btn-primary btn-outline-primary rounded-pill btn-lg font-weight-bolder">
            <a href="logout.php"  class="text-white text-center"  >
            <p>LOGOUT</p>
            </a>
        </div>
    </div>
</body>
</html>
The output of the above example

Step 6: Creating the Logout file
Now, let’s create a “logout.php” file. When the user clicks on the logout button, the script inside this file destroys the session and redirect the user back to the login page.
<?php
    session_start();
    if(!isset($_SESSION["username"])){
    header("Location: home.php");
    exit(); }
?>
Step 7: Creating the Authentication file
Now, let’s create a “auth.php” file. Check if the user is logged in or not. if not logged in then the user will be redirect to “login.php” automatically.
<?php
    session_start();
    if(!isset($_SESSION["username"])){
    header("Location: home.php");
    exit(); }
?>Related:-


