Before how to Install XAMPP and WordPress Locally on Windows PC we should know what is WordPress and Xampp.
What is WordPress?
WordPress is the simplest, most popular way to create your website or blog. There are many Websites on the Internet which is powered by WordPress.
WordPress is a free and open-source content management system based on PHP and MySQL. Which means that anyone can use or modify the WordPress software for free.
WordPress makes building a website accessible to anyone – even people who aren’t developers.
What is Xampp?
Xampp is a free and open-source, cross-platform web server solution stack package. XAMPP stands for Cross-Platform (X), Apache (A), MariaDB (M), PHP (P) and Perl (P).
It is a simple, lightweight Apache distribution that makes it extremely easy for developers to create a local web server for testing and deployment purposes. Everything needed to set up a web server – server application (Apache), database (MariaDB), and scripting language (PHP) – is included in an extractable file. XAMPP is also cross-platform, which means it works equally well on Linux, Mac, and Windows. Since most actual web server deployments use the same components as XAMPP, it makes transitioning from a local test server to a live server extremely easy as well.
How to Install XAMPP and WordPress Locally on Windows PC
Step 1: Download and install XAMPP on your computer
The first step is to Download the XAMPP file and Install it on your PC and open it. If you don’t know, follow the steps below.
How to install XAMPP on your PC?
Go to Xampp page by clicking here. You see this Download Xampp by clicking on the red box Download button.

- Once the download finishes, run the file. If you’re running antivirus software on your PC, you might get a warning like this, Simply click on YES.
- Once you get through all of the prompts, you should see the standard installer screen.
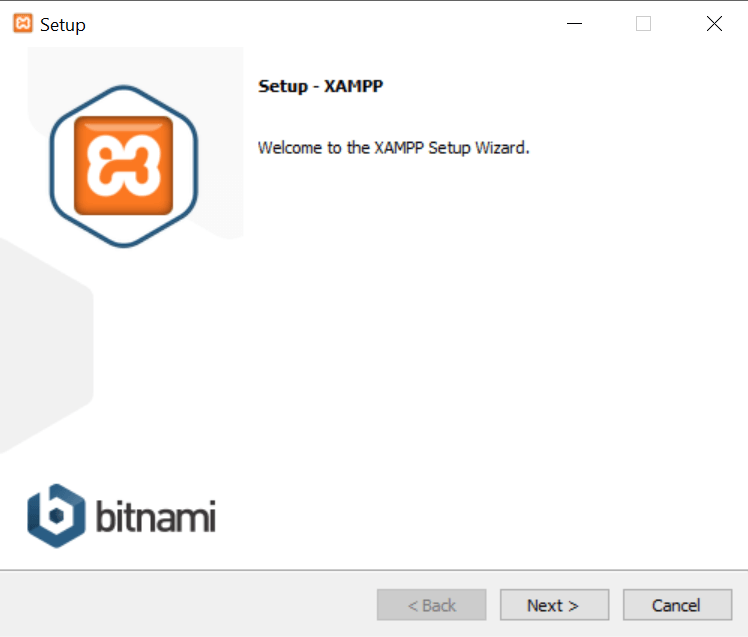
Just click Next to continue.
You can choose which components to install. To install XAMPP and WordPress, You can click on every component, but this two-component must be there on your PC.
- MySQL
- PHPMyAdmin
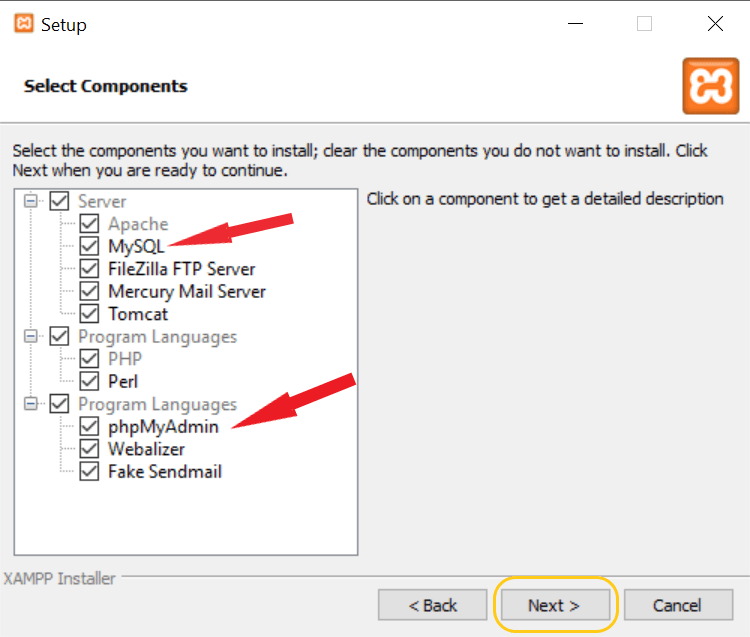
Just click Next to continue.
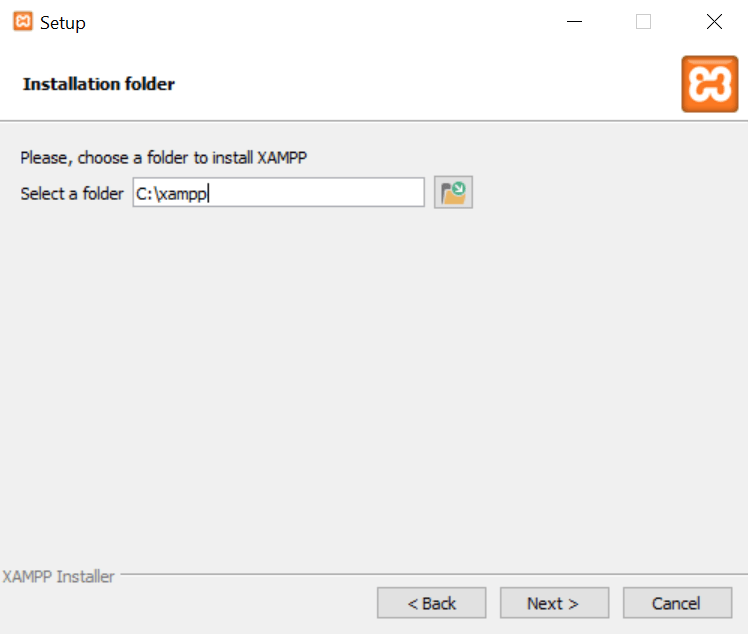
You can now select which folder to install XAMPP. You can leave it as the default:
On the next screen, uncheck the box and don’t click on any link.
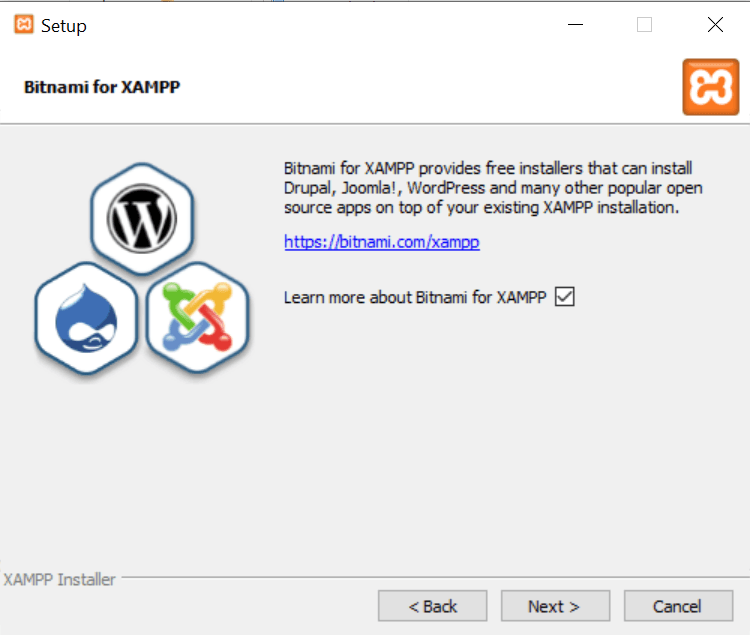
Just click Next to continue.
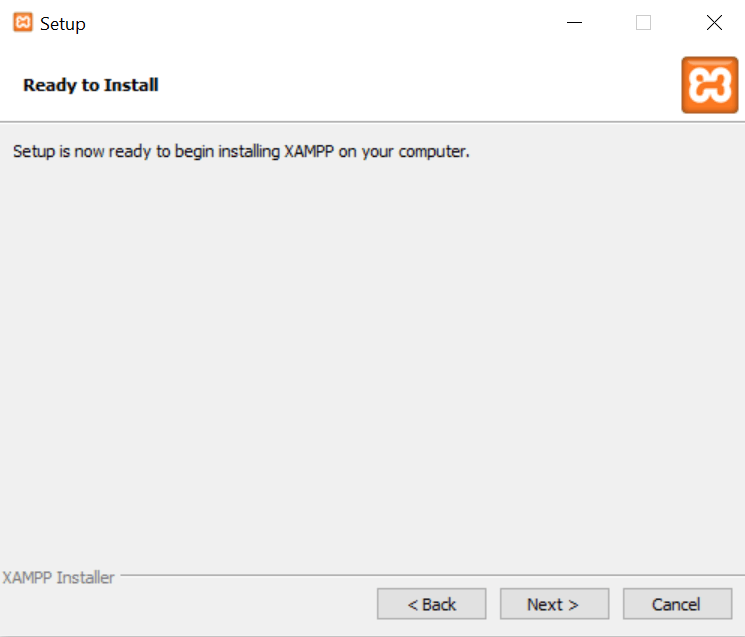
Just click Next to continue and you are ready to run the install. The install process might take a few minutes:
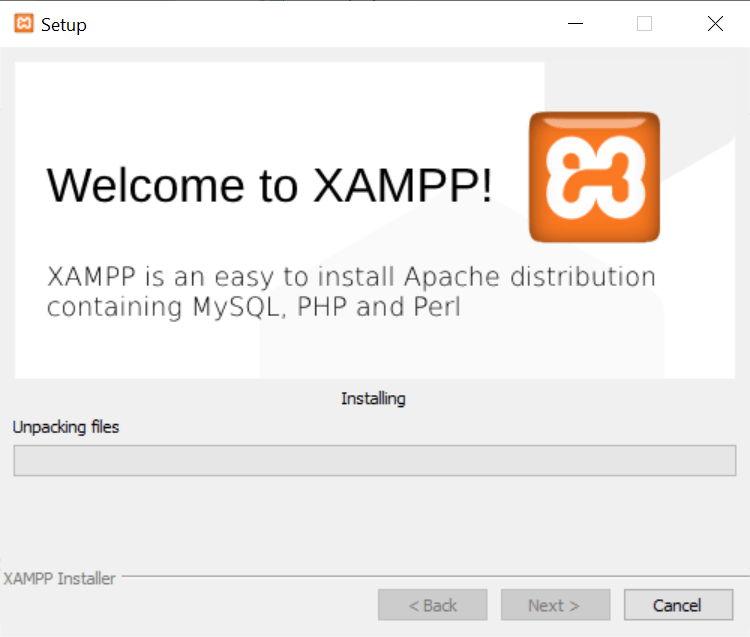
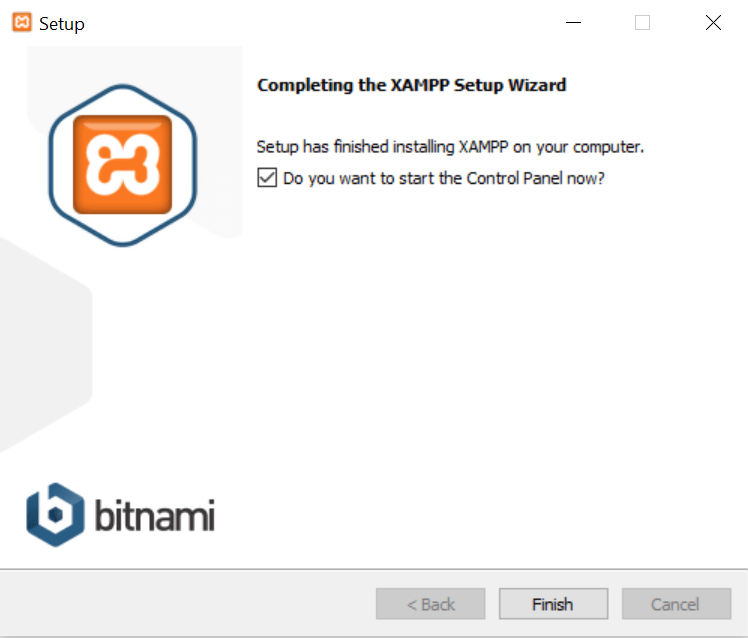
Once it finishes, you can launch the control panel to start working with XAMPP:
Step 2: Start the Control panel and test your server
Every time you need to open the control panel of xampp before you open your server.
Start the Apache and MySQL because you need to connect the internet using port 80 and database using SQL.
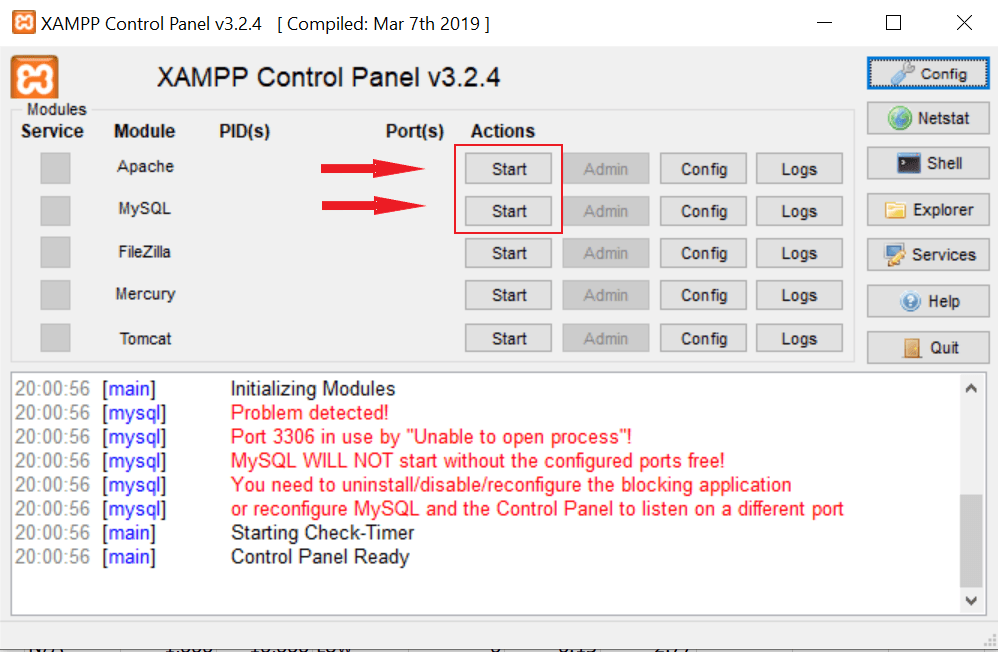
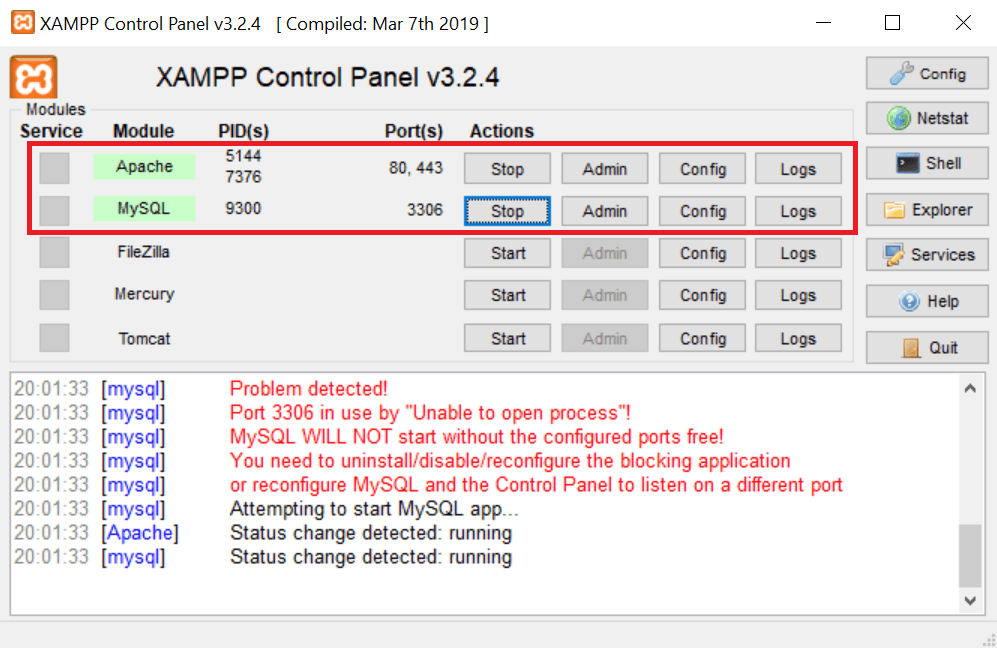
And now type http://localhost/ in the web browser of your choice to access the xampp board. This means that your xamp server is working.

But now it’s time to install WordPress on XAMPP. So here’s how to get a WordPress site up and running on XAMPP.
How to install WordPress on XAMPP
Step 3: Add the WordPress files
To download WordPress file you need to go to wordpress.org and download the latest version of WordPress.

After Download WordPress.zip. The file is in the compressed mode, you need to uncompressed the file.
- Copy the uncompressed the file and paste to C:\xampp\htdocs

Go to C:\xampp\htdocs

In this, you can see the copied file of WordPress. You can rename the file also.
Example:- Name of the file is Tech
Here you find the data of the WordPress file.

Step 4: Create a database for WordPress
Next, you need to create a MySQL database for your WordPress install. To do that, launch PHPMyAdmin from your XAMPP control panel:
Go to the control panel and start Apache and MySQL.

After the start go to a web browser and type “localhost/phpmyadmin/”f

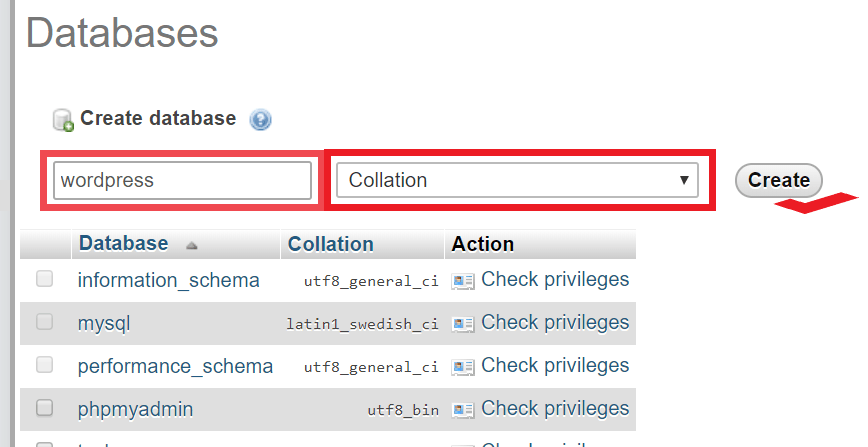
Then click on Databases at the top:

And enter a name for your database and click Create. Your name can be anything – just remember it because you’ll need it for the next step:
Step 5: Install WordPress locally via the on-screen installer
When you visit your test site, you should see the normal WordPress installer. Remember, your test site link is http://localhost/FOLDERNAME:
Enter the Language and click continue.

The only step where this process will differ from a normal install is the database details. When you get to the database details, enter them like this:

- Database Name = Name of the database you created in PHPMyAdmin, I created “WordPress”
- Username = “root”
- Password = leave blank or write
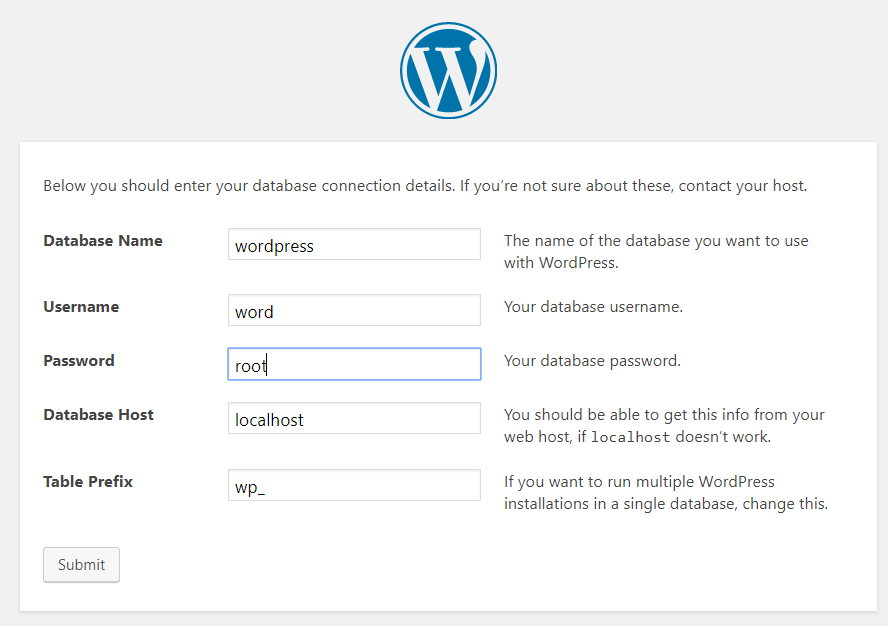
Click on submit. If clicking on submitting this above error is displayed, then go down and check how to Solve an Error establishing a database connection or Continue.

After pressing continue.

Click on Run the installation.
- Give the site title, you can change after also.
- Type username and password as it is.
- Type email-id.
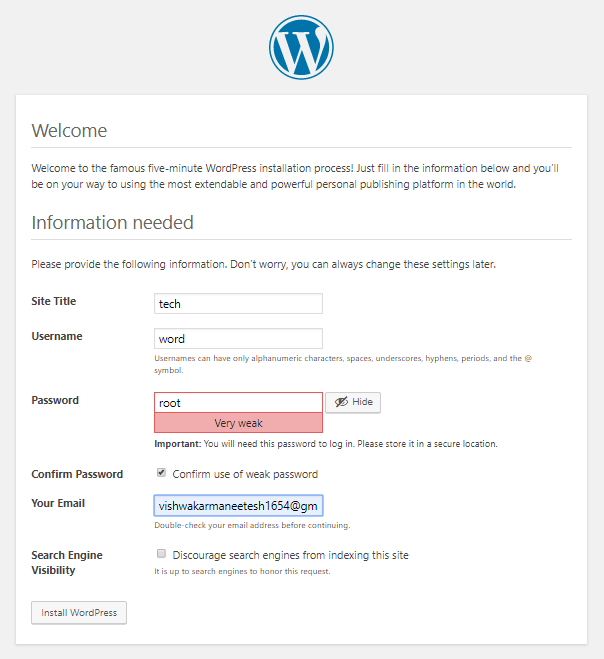
Click on Install WordPress.
After, you see this: The site is experiencing technical difficulties. Reload the page.
Type the username and password as it is

Click on login.
This is your Dashboard. Here you can change according to your needs

This is your site.

Step 6: How to Solve an Error establishing a database connection
If you see this then follow the command as it is.
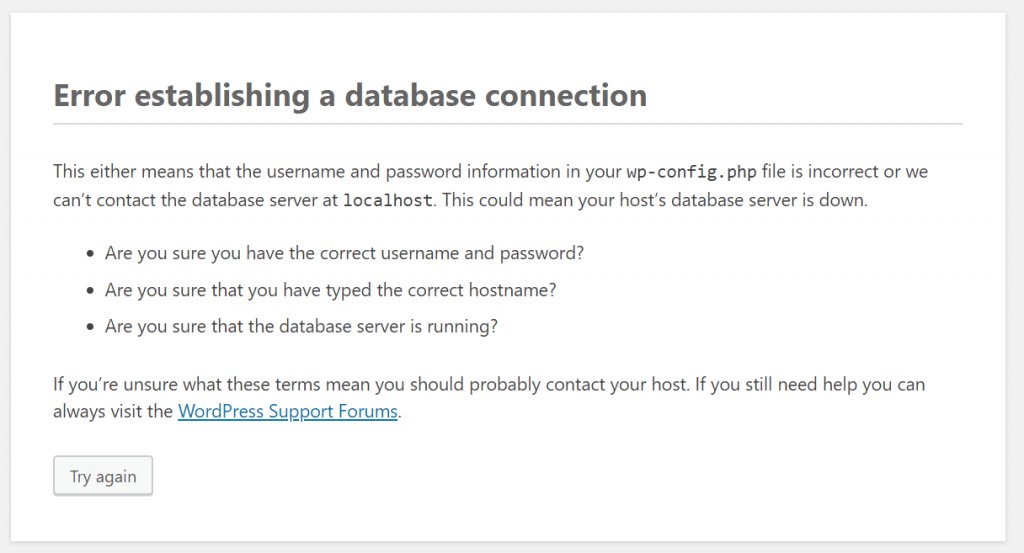
This Error establishing a database connection means your database is not connected properly to MySQL. In order to resolve this problem you need to create a user account and connect to WordPress.
To create a user account first go to the browser and type “localhost/phpmyadmin/ “in that go to the User account.
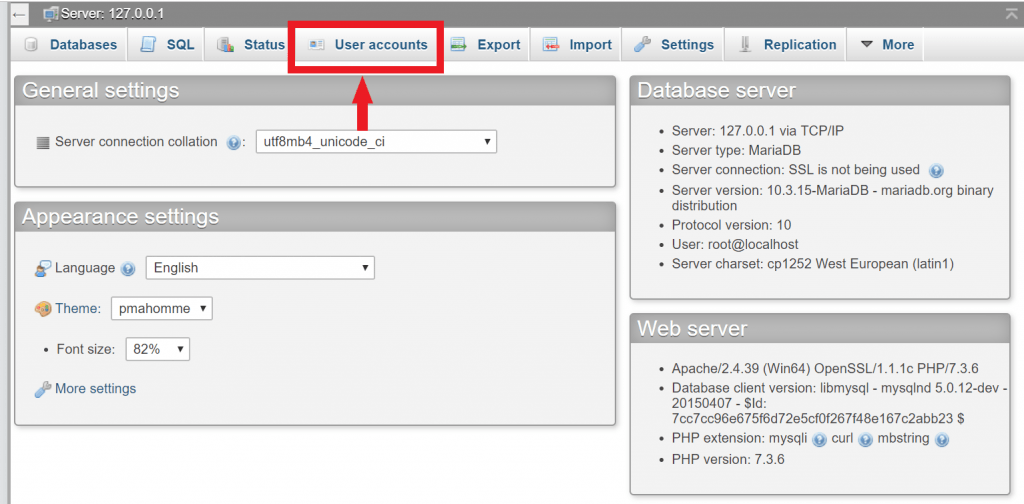
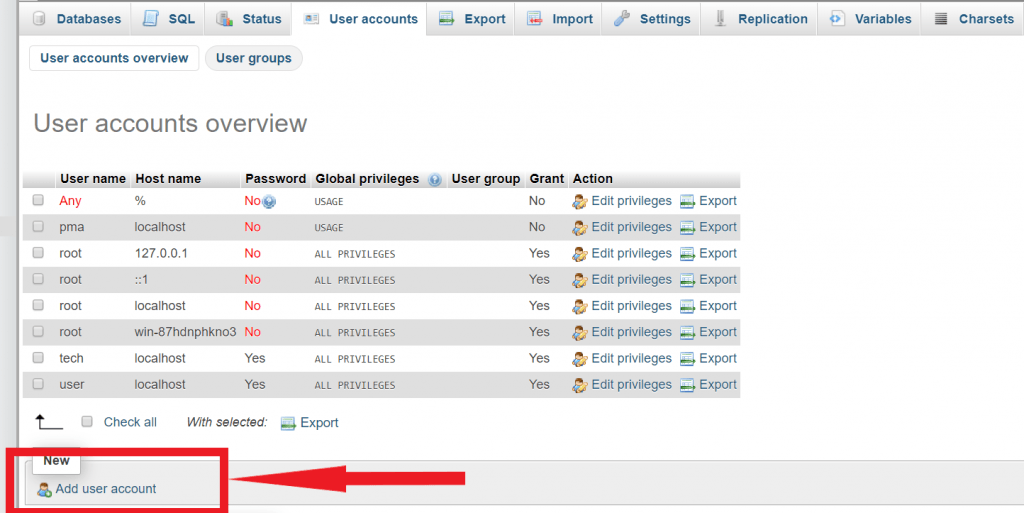
In that go to Add a user account.
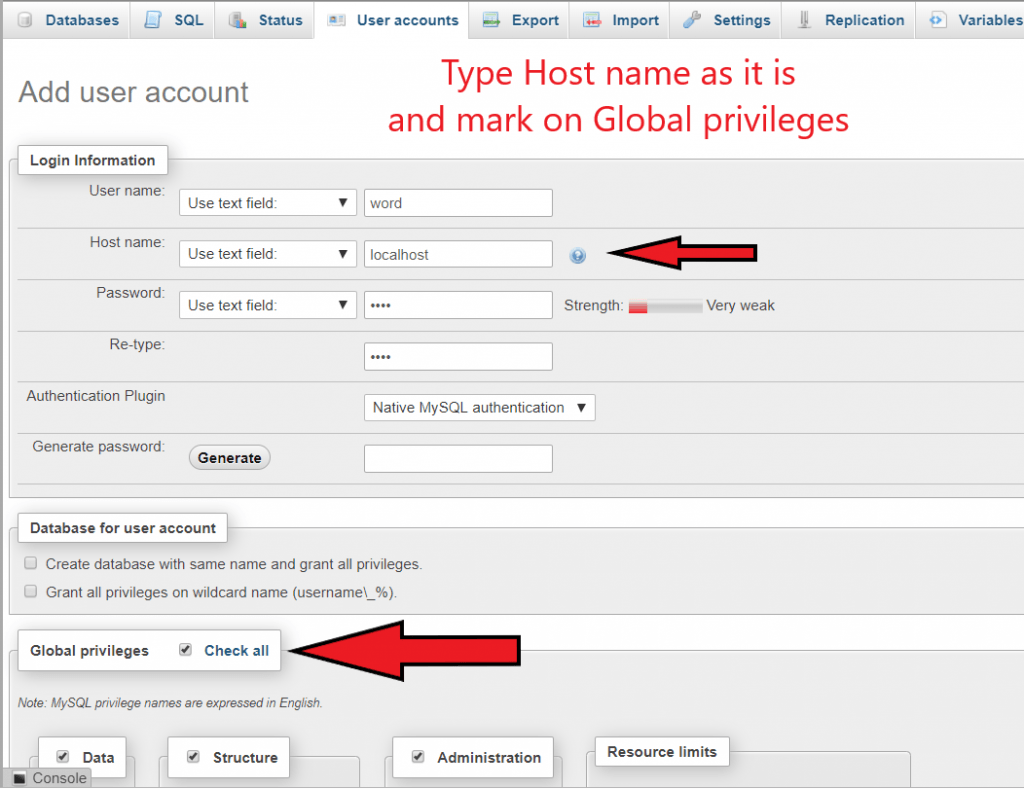
- Type User name and Password same as above.
- IN Hostname type: – localhost
- Remember to click in a checkbox field.

How to Install XAMPP and WordPress Locally
After this, the process is the same as Step 5.
To go to the site again
- Search in your PC ⇒ Xampp control panel
- Open it
- Now go to chrome in URL type: /WordPress/login and Enter.
- Your login page
- Types username and password and submit.
- Now your site is open and you are ready to edit.
This way you see how to Install XAMPP and WordPress Locally on Windows PC. I found this tool useful because it is speedier and more effective to create the best websites.
Also View:- How to Install a Bitnami WordPress.How to Install a Bitnami WordPressAlso View:- How to Install a Bitnami WordPressAlso View:- How to Install a Bitnami WordPressAlso View:-
Also, View- Best android apps all the time


Good way of describing, and nice piece of writing to get data on the topic of my presentation subject, which i am going to deliver in college.|
I simply could not leave your site prior to suggesting that I actually enjoyed the usual info an individual supply in your guests? Is gonna be back incessantly in order to check out new posts|
Do you mind if I quote a couple of your posts as long as I provide credit and sources back to your site? My blog is in the exact same area of interest as yours and my visitors would definitely benefit from a lot of the information you present here. Please let me know if this okay with you. Thank you!|
Its ok
I am in fact glad to read this blog posts which includes plenty of useful information, thanks for providing these information.|
Hello there, You have done a fantastic job. I’ll certainly digg it and for my part recommend to my friends. I’m sure they’ll be benefited from this site.|
In our blog post on how to clean earbuds and headphones, we recommend wiping down headphones’ earpads and tips regularly with a mixture of soap and warm water on a lightly damp cloth. If your headphones are powered, make sure they’re off and disconnected before doing this.
Hi there, just changed into aware of your weblog via Google, and found that it is really informative. I am going to watch out for brussels. I will be grateful should you proceed this in future. Numerous other people will be benefited out of your writing. Cheers!|
No matter if some one searches for his vital thing, thus he/she wants to be available that in detail, so that thing is maintained over here.|
Before borrowing or lending a pair of headphones, always make sure to give them a quick wipe-down.
Unquestionably believe that which you said. Your favorite justification appeared to be on the web the easiest thing to be aware of. I say to you, I definitely get annoyed while people consider worries that they just do not know about. You managed to hit the nail upon the top and also defined out the whole thing without having side effect , people can take a signal. Will probably be back to get more. Thanks|
all the time i used to read smaller articles or reviews which as well clear their motive, and that is also happening with this paragraph which I am reading at this place.|
It’s such as you read my thoughts! You seem to grasp a lot about this, such as you wrote the guide in it or something. I believe that you can do with some p.c. to pressure the message house a bit, but other than that, that is great blog. A fantastic read. I will certainly be back.|
I’d like to find out more? I’d want to find out some additional information.|
Can you express to us what kind of information you want?
It’s appropriate time to make some plans for the future and it’s time to be happy. I’ve read this post and if I could I desire to suggest you some interesting things or suggestions. Maybe you could write next articles referring to this article. I desire to read more things about it!|
Thanks for the suggestion. if you want to know any topic related to this, then say us.
Howdy, i read your blog from time to time and i own a similar one and i was just wondering if you get a lot of spam comments? If so how do you reduce it, any plugin or anything you can advise? I get so much lately it’s driving me crazy so any help is very much appreciated.|
Use any captcha plugin. This block the spam comments